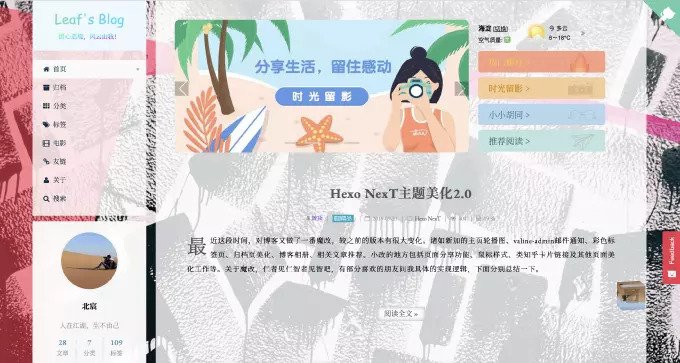
前期,对网站一番魔改,视觉效果全面提升。功能诸如主页轮播图、评论邮件通知、标签页美化、归档页美化、相册、文章推荐等。小改的地方包括页面分享功能、鼠标样式、类知乎卡片页…关于魔改,仁者见仁智者见智,在此记录一下相关功能的具体实现。
PS:本站 已集成以下所有功能,全动态配置,欢迎 star、fork !
主页轮播图
在 /themes/next/layout/_macro/ 目录下,新建 carousel.swig 文件:
carousel.swig在 /themes/next/layout/index.swig 中,找到
1 | {% block content %} |
在其下方引入新建的 carousel.swig 文件:
1 | <!--轮播图--> |
- 在主题配置文件末尾添加:
1 | #Home carousel map, from means link, img means picture |
轮播图相应的实现逻辑,可参考 Bootstrap 官方 Carousel 实现:
可能遇到的问题
- the requested content cannot be loaded. please try again later
如点击轮播图出现
可在 /themes/next/source/js/src/utils.js 的 wrapImageWithFancyBox 方法中增加以下第 8 行代码:
1 | wrapImageWithFancyBox: function () { |
然后,在 carousel.swig 中,为 img 标签加上:
1 | class="nofancybox" |
- 轮播图锚点(被困扰 N 久)
点击轮播图左右导航按钮时,a 标签的 href 会锚点到 myCarousel 处,引起页面滚动。可将 href 属性改成 data-target,如下:
1 | <a class="left carousel-control" data-target="#myCarousel" href="javascript:void(0);" role="button" data-slide="prev"> |
以下是本站 carousel.swig 和图标:
carousel.swig icon-slides注意:部分图片需自己制作,样式微调
valine-admin
刚建站那会,使用了多款评论插件,从 gitalk 到 livere(来必力)到 valine,一路折腾,最终找到了更喜欢的 valine-admin
Valine Admin 是 Valine 评论系统的扩展和增强,主要实现评论邮件通知、评论管理、垃圾评论过滤等功能。支持完全自定义的邮件通知模板,基于 Akismet API 实现准确的垃圾评论过滤
Hexo NexT主题整合步骤如下:
下载 Valine.min.js 文件,放到 /themes/next/source/js/src/ 下,也可以上传到自己的服务器或主机上(或者直接使用别人提供的外链)。
修改 /themes/next/layout/_third-party/comments/valine.swig 代码如下:
1 | {% if theme.valine.enable and theme.valine.appid and theme.valine.appkey %} |
主题配置文件中的 valine 可这样配置:
1 | valine: |
这样就完成 valine 替换,不过文章标题下方的评论数会不显示,这功能作者目前没有实现,只能先隐藏,详细教程可参考:
有关 Valine Admin 邮件通知功能,可参考:
我使用的是国际版 Leancloud,要对应于北京时间,可相应减8小时,例如我是这样配置:
1 | # 北京时间每天早8点检查过去24小时内漏发的通知邮件并补发 |
1 | # 每天早0点到晚23点每隔30分钟访问云引擎 |
可根据后边的『下次执行时间』进行调整。
附上我个人正在使用的邮件模板和邮件主题
MAIL_TEMPLATE_ADMIN:
1 | <div style="border-radius: 10px 10px 10px 10px;font-size:13px; color: #555555;width: 666px;font-family:'Century Gothic','Trebuchet MS','Hiragino Sans GB',微软雅黑,'Microsoft Yahei',Tahoma,Helvetica,Arial,'SimSun',sans-serif;margin:50px auto;border:1px solid #eee;max-width:100%;background: #ffffff repeating-linear-gradient(-45deg,#fff,#fff 1.125rem,transparent 1.125rem,transparent 2.25rem);box-shadow: 0 1px 5px rgba(0, 0, 0, 0.15);"><div style="width:100%;background:#49BDAD;color:#ffffff;border-radius: 10px 10px 0 0;background-image: -moz-linear-gradient(0deg, rgb(67, 198, 184), rgb(255, 209, 244));background-image: -webkit-linear-gradient(0deg, rgb(67, 198, 184), rgb(255, 209, 244));height: 66px;"><p style="font-size:15px;word-break:break-all;padding: 23px 32px;margin:0;background-color: hsla(0,0%,100%,.4);border-radius: 10px 10px 0 0;">您的<a style="text-decoration:none;color: #ffffff;" href="${SITE_URL}"> 『${SITE_NAME}』 </a>上有了新的评论 </p></div><div style="margin:40px auto;width:90%"><p><strong>"${NICK}"</strong> 发表评论:</p><div style="background: #fafafa repeating-linear-gradient(-45deg,#fff,#fff 1.125rem,transparent 1.125rem,transparent 2.25rem);box-shadow: 0 2px 5px rgba(0, 0, 0, 0.15);margin:20px 0px;padding:15px;border-radius:5px;font-size:14px;color:#555555;">${COMMENT}</div><p><a style="text-decoration:none; color:#12addb" href="${POST_URL}" target="_blank">[查看详情]</a></p><style type="text/css">a:link{text-decoration:none}a:visited{text-decoration:none}a:hover{text-decoration:none}a:active{text-decoration:none}</style></div></div> |
MAIL_TEMPLATE:
1 | <div style="border-radius: 10px 10px 10px 10px;font-size:13px;color: #555555;width: 666px;font-family:'Century Gothic','Trebuchet MS','Hiragino Sans GB',微软雅黑,'Microsoft Yahei',Tahoma,Helvetica,Arial,'SimSun',sans-serif;margin:50px auto;border:1px solid #eee;max-width:100%;background: #ffffff repeating-linear-gradient(-45deg,#fff,#fff 1.125rem,transparent 1.125rem,transparent 2.25rem);box-shadow: 0 1px 5px rgba(0, 0, 0, 0.15);"><div style="width:100%;background:#49BDAD;color:#ffffff;border-radius: 10px 10px 0 0;background-image: -moz-linear-gradient(0deg, rgb(67, 198, 184), rgb(255, 209, 244));background-image: -webkit-linear-gradient(0deg, rgb(67, 198, 184), rgb(255, 209, 244));height: 66px;"><p style="font-size:15px;word-break:break-all;padding: 23px 32px;margin:0;background-color: hsla(0,0%,100%,.4);border-radius: 10px 10px 0 0;">您在<a style="text-decoration:none;color: #ffffff;" href="${SITE_URL}">『${SITE_NAME}』</a>上的留言有新回复啦!!!</p></div><div style="margin:40px auto;width:90%"><p>"<strong>${PARENT_NICK}</strong>" 同学,您曾发表评论:</p><div style="background: #fafafa repeating-linear-gradient(-45deg,#fff,#fff 1.125rem,transparent 1.125rem,transparent 2.25rem);box-shadow: 0 2px 5px rgba(0, 0, 0, 0.15);margin:20px 0px;padding:15px;border-radius:5px;font-size:14px;color:#555555;">${PARENT_COMMENT}</div><p>"<strong>${NICK}</strong>" 给您的回复如下:</p><div style="background: #fafafa repeating-linear-gradient(-45deg,#fff,#fff 1.125rem,transparent 1.125rem,transparent 2.25rem);box-shadow: 0 2px 5px rgba(0, 0, 0, 0.15);margin:20px 0px;padding:15px;border-radius:5px;font-size:14px;color:#555555;">${COMMENT}</div><p>您可以点击:<a style="text-decoration:none; color:#12addb" href="${POST_URL}">[回复的完整内容] </a>进行查看。欢迎再次光临<a style="text-decoration:none; color:#12addb" href="${SITE_URL}"> 『${SITE_NAME}』</a>!!!</p><style type="text/css">a:link{text-decoration:none}a:visited{text-decoration:none}a:hover{text-decoration:none}a:active{text-decoration:none}</style></div></div> |
MAIL_SUBJECT_ADMIN:
1 | 叮咚!『${SITE_NAME}』上有了新评论! |
MAIL_SUBJECT:
1 | ${PARENT_NICK},您在『${SITE_NAME}』上的评论收到了回复 |
另外:点击邮件中的链接跳转至相应评论,可在 /themes/next/layout/_third-party/comments/valine.swig 中添加如下代码:
1 | <script> |
具体效果,可在下方的评论区体验哦~
彩色标签页
在 /themes/next/layout/ 目录下,新增 tag-color.swig 文件,填入如下内容:
1 | <script type="text/javascript"> |
在同级目录的 page.swig 中引入 tag-color.swig
1 | <div class="tag-cloud"> |
hexo 三连,打开 我的标签页 看看效果吧
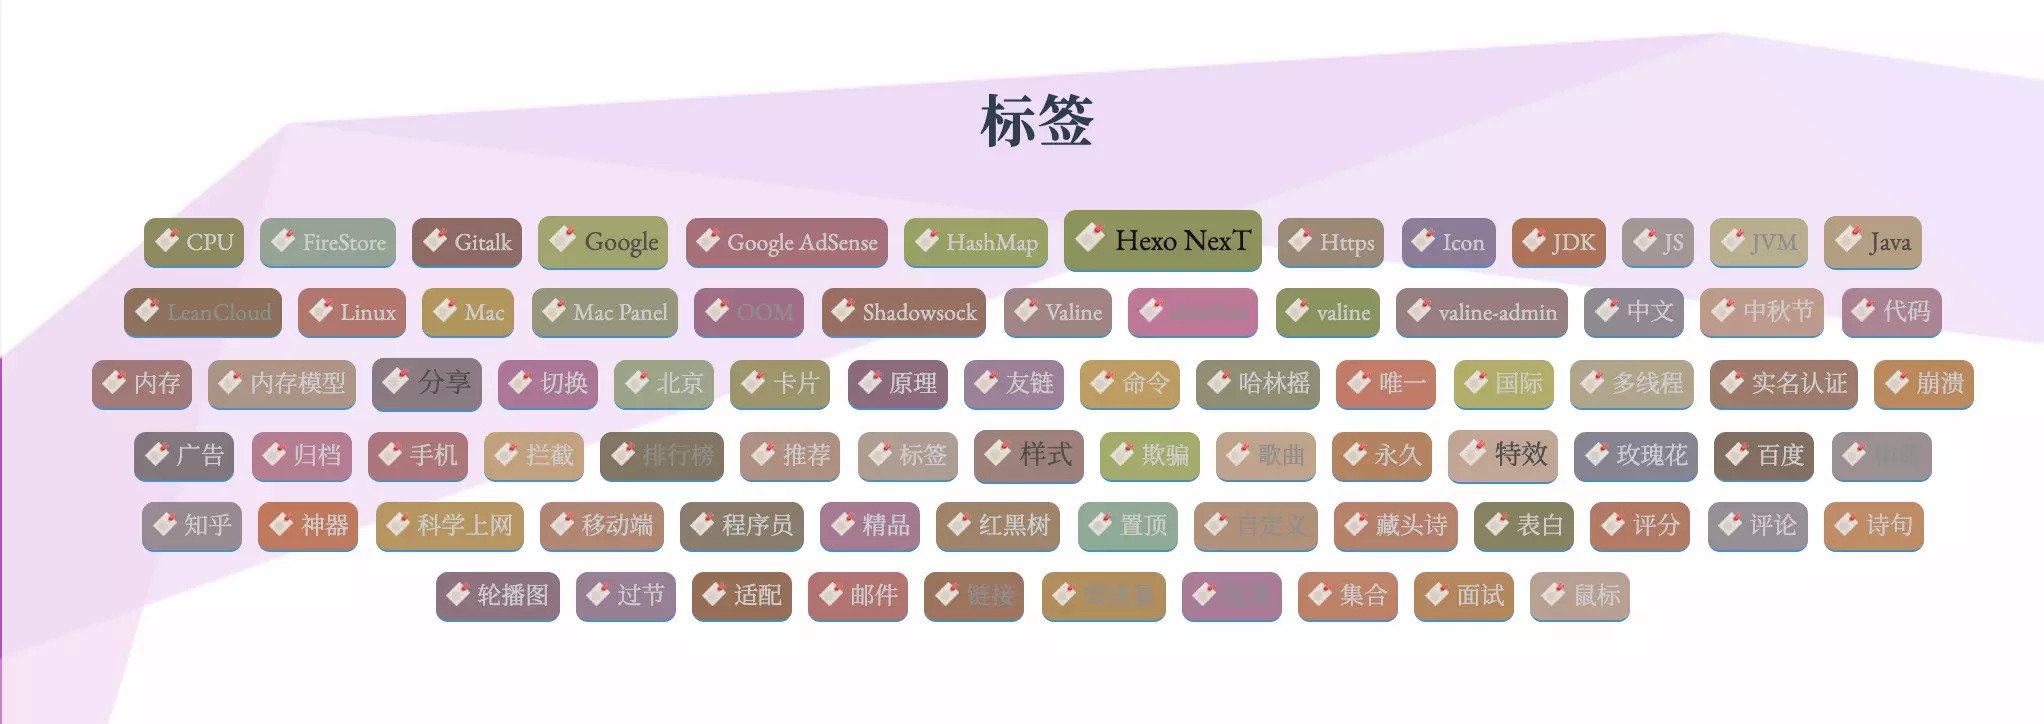
以下是文章底部的标签样式
1 | /*文章底部标签样式*/ |
代码拷入 /themes/next/source/css/_custom/custom.styl 即可,效果参考文章末尾处的标签。其它自定义标签样式,可参考:
归档页美化
- 修改 /themes/next/layout/_macro/post-collapse.swig 后的代码如下:
1 | {% macro render(post) %} |
主要修改:一是将 post-meta 这个 div 移到前面 header 标签下;二是将所有的 class 属性都加上 my-,例如 my-post-meta,这样改动是为了不影响其它页面引用的样式。
- 在 /themes/next/source/css/_custom/custom.styl 新增如下样式:
1 | /* 归档页样式 began */ |
根据需要调整对应的样式,效果可查看:
相册
相册功能可参考兰州小红鸡,使用的是腾讯云 cos 作为相册存储桶。实名认证后,赠送 50GB 标准存储容量,有效期 6 个月,但是访问或下载对象产生的外网下行流量是单独计费的,可以购买 COS 下行流量包,具体可参考官网。
相册调试开始的这两天,我每天刷掉了 5G 左右的流量,费用大概 5 块钱吧,欠费第二天就被禁用了,需要充值缴费,要么删数据。腾讯嘛,你懂的。虽然流量也不是很贵,但对我这种负债的人来说,还是想想其他办法吧,主要是免费的用惯了,哈哈~
期间也考虑使用七牛云图床,对象存储的官方 SDK 挺全,也能通过 api 获取到图片。主要是不想整这么复杂,再者我还没绑定域名,其融合 CDN 加速域名会在 30 个自然日后自动回收。当然了,它的 CDN-HTTP 流量也是按量收费,貌似没腾讯的贵。基本是类似的一个套路吧。
考虑到自己这相册也不常用,放上些个性化图片就行,无需经常更新,所以就选择用免费的图床链接来实现。完整代码:
index.md部分逻辑参考小红鸡的做法,这里代码做了简化,将图片标题、链接写成 json 格式即可。自定义排序,拷贝代码到你的网站即可看到效果,其他样式按需修改,效果:
文章推荐
文章结束时,开启相关文章推荐功能,会根据文章标签的相关度推荐相关的文章,效果像这样:
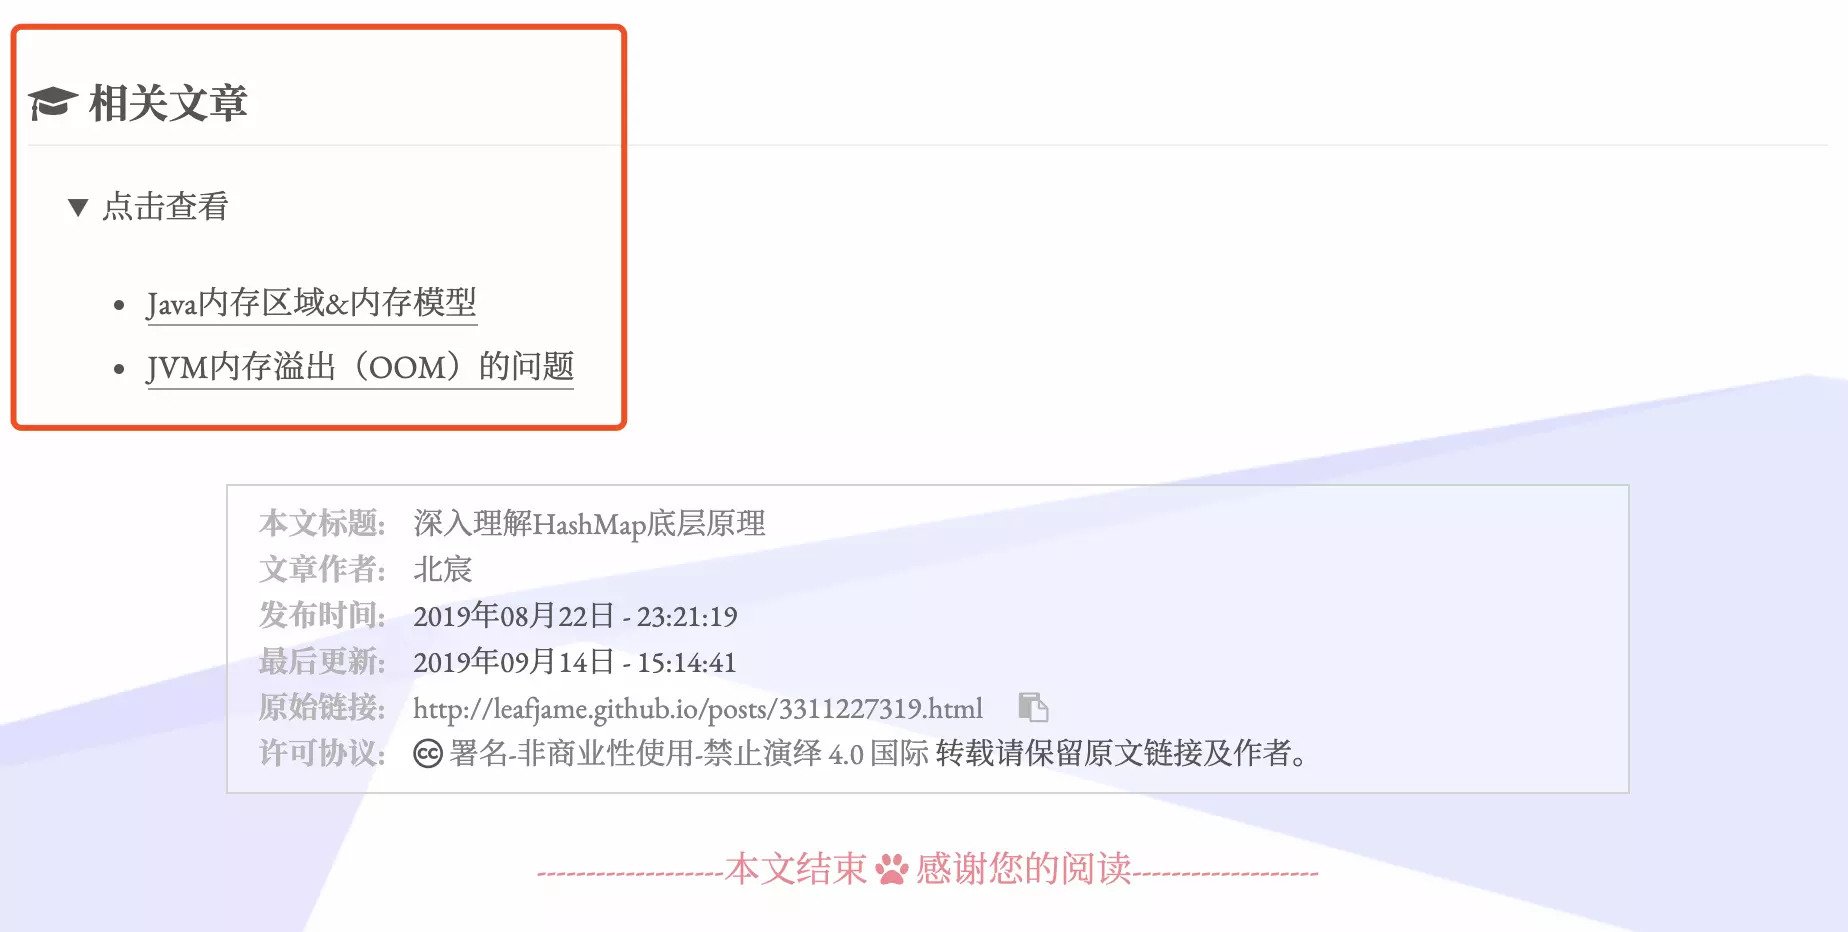
- 该功能需要依赖 hexo-related-popular-posts 插件:
1 | npm install hexo-related-popular-posts --save |
- 在 /themes/next/layout/_macro/ 目录下,新建 post-related.swig 文件,内容如下:
1 | {% set popular_posts = popular_posts_json(theme.related_posts.params, post) %} |
在同级别的 post.swig 中 END POST BODY 上方(POST 文章末尾)引入:
1 | <!-- 相关文章推荐 --> |
- 主题配置文件末尾加入如下配置:
1 | # Dependencies: https://github.com/tea3/hexo-related-popular-posts |
- 可选配置,在 /themes/next/source/css/_custom/custom.styl 中添加:
1 | /*相关文章推荐 pc样式设置*/ |
shareJS 分享
之前用的百度分享样式不大美观,加载不稳定,不支持 https(虽然改好了)等多种原因,遂使用 shareJS 进行了替换,文档里提供了多种安装方式,简单说下我的步骤。
github 下载 zip 文件,将解压的文件夹 dist 放到 next/source/ 目录
在 next/layout/_layout.swig 中 body 标签内部引入:
1 | <!--share.js--> |
- 在 /themes/next/layout/_partials/share/ 目录下新增 sharejs.swig 文件,添加如下代码:
1 | <div |
- 在 /themes/next/layout/post.swig 中
<div class="post-spread">标签内部 endif 前引入:
1 | {% elseif theme.share_js %} |
- 主题配置文件增加:
1 | share_js: true |
鼠标样式
在 /themes/next/source/css/_custom/custom.styl 添加样式:
1 | /* 鼠标样式 */ |
用到的两个文件:default.cur、pointer.cur 位于 images 目录下,因为是 .cur 这种静态光标文件,编辑器打开是一堆 ASCII 码,这里就不贴了,直接附上链接,当然,你也可以在浏览器里获取。
default.cur pointer.cur鼠标点击特效(4种)
常用的 4 种特效为大家所列如下:

在主题 _config.yml 中添加动态配置项:
1 | cursor_effect: |
在 /themes/next/layout/_custom/custom.swig 中,添加如下代码:
1 | {% if theme.cursor_effect %} |
如果是第一次使用这个 custom.swig,则需要在 /themes/next/layout/_layout.swig 中引入
1 | {% include '_custom/custom.swig' %} |
这里主要用到 /themes/next/source/js/cursor/ 目录的 4 个 JS 文件,下边分别贴一下代码
fireworks.js
fireworks.jsexplosion.min.js
1 | ;function updateCoords(e){pointerX=(e.clientX||e.touches[0].clientX)-canvasEl.getBoundingClientRect().left,pointerY=e.clientY||e.touches[0].clientY-canvasEl.getBoundingClientRect().top}function setParticuleDirection(e){var t=anime.random(0,360)*Math.PI/180,a=anime.random(50,180),n=[-1,1][anime.random(0,1)]*a;return{x:e.x+n*Math.cos(t),y:e.y+n*Math.sin(t)}}function createParticule(e,t){var a={};return a.x=e,a.y=t,a.color=colors[anime.random(0,colors.length-1)],a.radius=anime.random(16,32),a.endPos=setParticuleDirection(a),a.draw=function(){ctx.beginPath(),ctx.arc(a.x,a.y,a.radius,0,2*Math.PI,!0),ctx.fillStyle=a.color,ctx.fill()},a}function createCircle(e,t){var a={};return a.x=e,a.y=t,a.color="#F00",a.radius=0.1,a.alpha=0.5,a.lineWidth=6,a.draw=function(){ctx.globalAlpha=a.alpha,ctx.beginPath(),ctx.arc(a.x,a.y,a.radius,0,2*Math.PI,!0),ctx.lineWidth=a.lineWidth,ctx.strokeStyle=a.color,ctx.stroke(),ctx.globalAlpha=1},a}function renderParticule(e){for(var t=0;t<e.animatables.length;t++){e.animatables[t].target.draw()}}function animateParticules(e,t){for(var a=createCircle(e,t),n=[],i=0;i<numberOfParticules;i++){n.push(createParticule(e,t))}anime.timeline().add({targets:n,x:function(e){return e.endPos.x},y:function(e){return e.endPos.y},radius:0.1,duration:anime.random(1200,1800),easing:"easeOutExpo",update:renderParticule}).add({targets:a,radius:anime.random(80,160),lineWidth:0,alpha:{value:0,easing:"linear",duration:anime.random(600,800)},duration:anime.random(1200,1800),easing:"easeOutExpo",update:renderParticule,offset:0})}function debounce(e,t){var a;return function(){var n=this,i=arguments;clearTimeout(a),a=setTimeout(function(){e.apply(n,i)},t)}}var canvasEl=document.querySelector(".fireworks");if(canvasEl){var ctx=canvasEl.getContext("2d"),numberOfParticules=30,pointerX=0,pointerY=0,tap="mousedown",colors=["#FF1461","#18FF92","#5A87FF","#FBF38C"],setCanvasSize=debounce(function(){canvasEl.width=2*window.innerWidth,canvasEl.height=2*window.innerHeight,canvasEl.style.width=window.innerWidth+"px",canvasEl.style.height=window.innerHeight+"px",canvasEl.getContext("2d").scale(2,2)},500),render=anime({duration:1/0,update:function(){ctx.clearRect(0,0,canvasEl.width,canvasEl.height)}});document.addEventListener(tap,function(e){"sidebar"!==e.target.id&&"toggle-sidebar"!==e.target.id&&"A"!==e.target.nodeName&&"IMG"!==e.target.nodeName&&(render.play(),updateCoords(e),animateParticules(pointerX,pointerY))},!1),setCanvasSize(),window.addEventListener("resize",setCanvasSize,!1)}"use strict";function updateCoords(e){pointerX=(e.clientX||e.touches[0].clientX)-canvasEl.getBoundingClientRect().left,pointerY=e.clientY||e.touches[0].clientY-canvasEl.getBoundingClientRect().top}function setParticuleDirection(e){var t=anime.random(0,360)*Math.PI/180,a=anime.random(50,180),n=[-1,1][anime.random(0,1)]*a;return{x:e.x+n*Math.cos(t),y:e.y+n*Math.sin(t)}}function createParticule(e,t){var a={};return a.x=e,a.y=t,a.color=colors[anime.random(0,colors.length-1)],a.radius=anime.random(16,32),a.endPos=setParticuleDirection(a),a.draw=function(){ctx.beginPath(),ctx.arc(a.x,a.y,a.radius,0,2*Math.PI,!0),ctx.fillStyle=a.color,ctx.fill()},a}function createCircle(e,t){var a={};return a.x=e,a.y=t,a.color="#F00",a.radius=0.1,a.alpha=0.5,a.lineWidth=6,a.draw=function(){ctx.globalAlpha=a.alpha,ctx.beginPath(),ctx.arc(a.x,a.y,a.radius,0,2*Math.PI,!0),ctx.lineWidth=a.lineWidth,ctx.strokeStyle=a.color,ctx.stroke(),ctx.globalAlpha=1},a}function renderParticule(e){for(var t=0;t<e.animatables.length;t++){e.animatables[t].target.draw()}}function animateParticules(e,t){for(var a=createCircle(e,t),n=[],i=0;i<numberOfParticules;i++){n.push(createParticule(e,t))}anime.timeline().add({targets:n,x:function(e){return e.endPos.x},y:function(e){return e.endPos.y},radius:0.1,duration:anime.random(1200,1800),easing:"easeOutExpo",update:renderParticule}).add({targets:a,radius:anime.random(80,160),lineWidth:0,alpha:{value:0,easing:"linear",duration:anime.random(600,800)},duration:anime.random(1200,1800),easing:"easeOutExpo",update:renderParticule,offset:0})}function debounce(e,t){var a;return function(){var n=this,i=arguments;clearTimeout(a),a=setTimeout(function(){e.apply(n,i)},t)}}var canvasEl=document.querySelector(".fireworks");if(canvasEl){var ctx=canvasEl.getContext("2d"),numberOfParticules=30,pointerX=0,pointerY=0,tap="mousedown",colors=["#FF1461","#18FF92","#5A87FF","#FBF38C"],setCanvasSize=debounce(function(){canvasEl.width=2*window.innerWidth,canvasEl.height=2*window.innerHeight,canvasEl.style.width=window.innerWidth+"px",canvasEl.style.height=window.innerHeight+"px",canvasEl.getContext("2d").scale(2,2)},500),render=anime({duration:1/0,update:function(){ctx.clearRect(0,0,canvasEl.width,canvasEl.height)}});document.addEventListener(tap,function(e){"sidebar"!==e.target.id&&"toggle-sidebar"!==e.target.id&&"A"!==e.target.nodeName&&"IMG"!==e.target.nodeName&&(render.play(),updateCoords(e),animateParticules(pointerX,pointerY))},!1),setCanvasSize(),window.addEventListener("resize",setCanvasSize,!1)}; |
love.min.js
1 | !function(e,t,a){function n(){c(".heart{width: 10px;height: 10px;position: fixed;background: #f00;transform: rotate(45deg);-webkit-transform: rotate(45deg);-moz-transform: rotate(45deg);}.heart:after,.heart:before{content: '';width: inherit;height: inherit;background: inherit;border-radius: 50%;-webkit-border-radius: 50%;-moz-border-radius: 50%;position: fixed;}.heart:after{top: -5px;}.heart:before{left: -5px;}"),o(),r()}function r(){for(var e=0;e<d.length;e++)d[e].alpha<=0?(t.body.removeChild(d[e].el),d.splice(e,1)):(d[e].y--,d[e].scale+=.004,d[e].alpha-=.013,d[e].el.style.cssText="left:"+d[e].x+"px;top:"+d[e].y+"px;opacity:"+d[e].alpha+";transform:scale("+d[e].scale+","+d[e].scale+") rotate(45deg);background:"+d[e].color+";z-index:99999");requestAnimationFrame(r)}function o(){var t="function"==typeof e.onclick&&e.onclick;e.onclick=function(e){t&&t(),i(e)}}function i(e){var a=t.createElement("div");a.className="heart",d.push({el:a,x:e.clientX-5,y:e.clientY-5,scale:1,alpha:1,color:s()}),t.body.appendChild(a)}function c(e){var a=t.createElement("style");a.type="text/css";try{a.appendChild(t.createTextNode(e))}catch(t){a.styleSheet.cssText=e}t.getElementsByTagName("head")[0].appendChild(a)}function s(){return"rgb("+~~(255*Math.random())+","+~~(255*Math.random())+","+~~(255*Math.random())+")"}var d=[];e.requestAnimationFrame=function(){return e.requestAnimationFrame||e.webkitRequestAnimationFrame||e.mozRequestAnimationFrame||e.oRequestAnimationFrame||e.msRequestAnimationFrame||function(e){setTimeout(e,1e3/60)}}(),n()}(window,document); |
text.js
1 | var a_idx = 0; |
打字特效 (评论、留言)
此功能主要通过 JS 监听页面的 input 输入框事件来实现。首先在主题 _config.yml 中添加动态配置项
1 | typing_effect: |
在 /themes/next/layout/_custom/custom.swig 中引入依赖
1 | {% if theme.typing_effect %} |
其中的 activate-power-mode.min.js 位于 /themes/next/source/js/src/ 目录,代码如下:
1 | (function webpackUniversalModuleDefinition(root,factory){if(typeof exports==='object'&&typeof module==='object')module.exports=factory();else if(typeof define==='function'&&define.amd)define([],factory);else if(typeof exports==='object')exports["POWERMODE"]=factory();else root["POWERMODE"]=factory()})(this,function(){return(function(modules){var installedModules={};function __webpack_require__(moduleId){if(installedModules[moduleId])return installedModules[moduleId].exports;var module=installedModules[moduleId]={exports:{},id:moduleId,loaded:false};modules[moduleId].call(module.exports,module,module.exports,__webpack_require__);module.loaded=true;return module.exports}__webpack_require__.m=modules;__webpack_require__.c=installedModules;__webpack_require__.p="";return __webpack_require__(0)})([function(module,exports,__webpack_require__){'use strict';var canvas=document.createElement('canvas');canvas.width=window.innerWidth;canvas.height=window.innerHeight;canvas.style.cssText='position:fixed;top:0;left:0;pointer-events:none;z-index:999999';window.addEventListener('resize',function(){canvas.width=window.innerWidth;canvas.height=window.innerHeight});document.body.appendChild(canvas);var context=canvas.getContext('2d');var particles=[];var particlePointer=0;POWERMODE.shake=true;function getRandom(min,max){return Math.random()*(max-min)+min}function getColor(el){if(POWERMODE.colorful){var u=getRandom(0,360);return'hsla('+getRandom(u-10,u+10)+', 100%, '+getRandom(50,80)+'%, '+1+')'}else{return window.getComputedStyle(el).color}}function getCaret(){var el=document.activeElement;var bcr;if(el.tagName==='TEXTAREA'||(el.tagName==='INPUT'&&el.getAttribute('type')==='text')){var offset=__webpack_require__(1)(el,el.selectionStart);bcr=el.getBoundingClientRect();return{x:offset.left+bcr.left,y:offset.top+bcr.top,color:getColor(el)}}var selection=window.getSelection();if(selection.rangeCount){var range=selection.getRangeAt(0);var startNode=range.startContainer;if(startNode.nodeType===document.TEXT_NODE){startNode=startNode.parentNode}bcr=range.getBoundingClientRect();return{x:bcr.left,y:bcr.top,color:getColor(startNode)}}return{x:0,y:0,color:'transparent'}}function createParticle(x,y,color){return{x:x,y:y,alpha:1,color:color,velocity:{x:-1+Math.random()*2,y:-3.5+Math.random()*2}}}function POWERMODE(){{var caret=getCaret();var numParticles=5+Math.round(Math.random()*10);while(numParticles--){particles[particlePointer]=createParticle(caret.x,caret.y,caret.color);particlePointer=(particlePointer+1)%500}}{if(POWERMODE.shake){var intensity=1+2*Math.random();var x=intensity*(Math.random()>0.5?-1:1);var y=intensity*(Math.random()>0.5?-1:1);document.body.style.marginLeft=x+'px';document.body.style.marginTop=y+'px';setTimeout(function(){document.body.style.marginLeft='';document.body.style.marginTop=''},75)}}};POWERMODE.colorful=false;function loop(){requestAnimationFrame(loop);context.clearRect(0,0,canvas.width,canvas.height);for(var i=0;i<particles.length;++i){var particle=particles[i];if(particle.alpha<=0.1)continue;particle.velocity.y+=0.075;particle.x+=particle.velocity.x;particle.y+=particle.velocity.y;particle.alpha*=0.96;context.globalAlpha=particle.alpha;context.fillStyle=particle.color;context.fillRect(Math.round(particle.x-1.5),Math.round(particle.y-1.5),3,3)}}requestAnimationFrame(loop);module.exports=POWERMODE},function(module,exports){(function(){var properties=['direction','boxSizing','width','height','overflowX','overflowY','borderTopWidth','borderRightWidth','borderBottomWidth','borderLeftWidth','borderStyle','paddingTop','paddingRight','paddingBottom','paddingLeft','fontStyle','fontVariant','fontWeight','fontStretch','fontSize','fontSizeAdjust','lineHeight','fontFamily','textAlign','textTransform','textIndent','textDecoration','letterSpacing','wordSpacing','tabSize','MozTabSize'];var isFirefox=window.mozInnerScreenX!=null;function getCaretCoordinates(element,position,options){var debug=options&&options.debug||false;if(debug){var el=document.querySelector('#input-textarea-caret-position-mirror-div');if(el){el.parentNode.removeChild(el)}}var div=document.createElement('div');div.id='input-textarea-caret-position-mirror-div';document.body.appendChild(div);var style=div.style;var computed=window.getComputedStyle?getComputedStyle(element):element.currentStyle;style.whiteSpace='pre-wrap';if(element.nodeName!=='INPUT')style.wordWrap='break-word';style.position='absolute';if(!debug)style.visibility='hidden';properties.forEach(function(prop){style[prop]=computed[prop]});if(isFirefox){if(element.scrollHeight>parseInt(computed.height))style.overflowY='scroll'}else{style.overflow='hidden'}div.textContent=element.value.substring(0,position);if(element.nodeName==='INPUT')div.textContent=div.textContent.replace(/\s/g,"\u00a0");var span=document.createElement('span');span.textContent=element.value.substring(position)||'.';div.appendChild(span);var coordinates={top:span.offsetTop+parseInt(computed['borderTopWidth']),left:span.offsetLeft+parseInt(computed['borderLeftWidth'])};if(debug){span.style.backgroundColor='#aaa'}else{document.body.removeChild(div)}return coordinates}if(typeof module!="undefined"&&typeof module.exports!="undefined"){module.exports=getCaretCoordinates}else{window.getCaretCoordinates=getCaretCoordinates}}())}])}); |
代码块复制功能
依赖 clipboard.js 实现,个性化配置可参考官方文档。在 /themes/next/layout/_custom/custom.swig 引入下载的 JS
1 | <script type="text/javascript" src="/js/src/clipboard.min.js"></script> |
位于 /themes/next/source/js/src/ 目录下的 clipboard.min.js 和 clipboard-use.js 代码分别如下
1 | /*! |
1 | /*页面载入完成后,创建复制按钮*/ |
可根据需要在 /themes/next/source/css/_custom/custom.styl 加 CSS
1 | .highlight{ |
类知乎卡片链接
- 在 /themes/next/source/js/src/ 下新建 linkcard.js ,内容如下:
1 | window.onload=function(){ |
需要修改 /images/linkcard.png 为你自己的图片。附上我在用的:linkcard.png
- 在 /themes/next/layout/_layout.swig 中 body 结束标签前,引入刚才新建的 js:
1 | <script type="text/javascript" src="/js/src/linkcard.js"></script> |
使用方式:
1 | <a href="https://www.liaofuzhan.com/photos/" class="LinkCard">我的相册——时光留影</a> |
效果:
文章首字下沉
在 themes/next/source/css/_custom/custom.styl 中添加如下样式
1 | .post-body>p:first-child::first-letter{ |
这是设置 class = post-body 这个 div 下的第一个 p 标签的样式,数值按需调整,效果:
文章评分功能
NexT 主题中已经集成了widgetpack 的星级评分功能,只需注册账号后,修改主题配置:
1 | # Star rating support to each article. |
可以在 widgetpack 控制台中修改评分认证
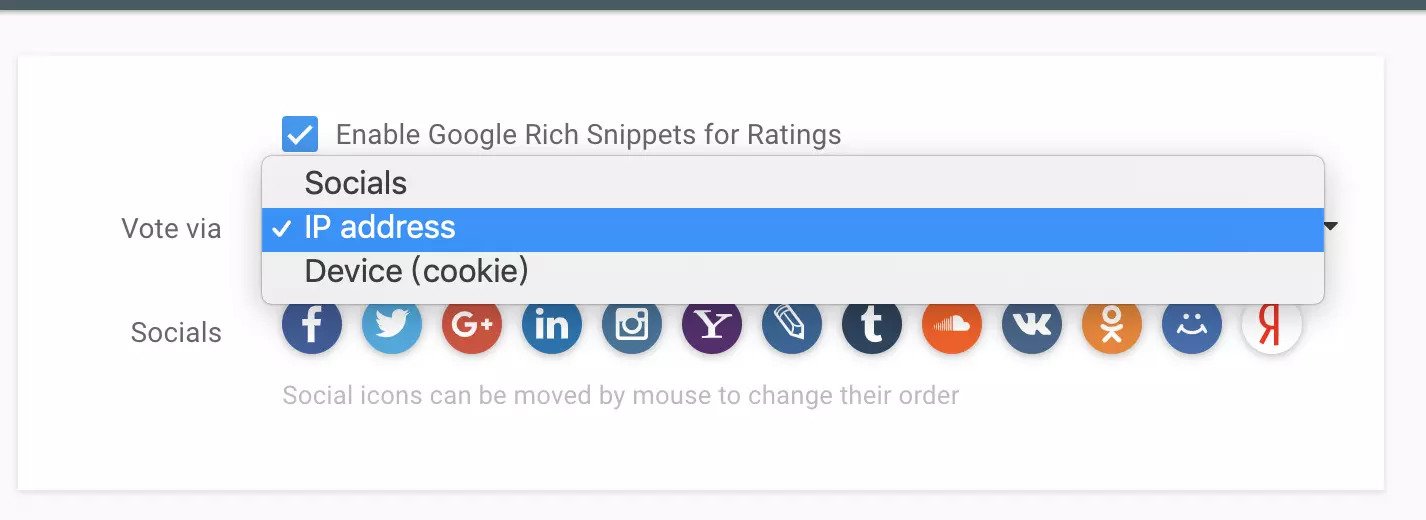
有三个选项,根据需要设置。
canvas粒子时钟
网上看到一款不错的 canvas 粒子时钟,遂整合到自己网站中来了,操作步骤:
在 /themes/next/layout/_custom/ 目录下,新建 clock.swig 文件,内容如下:
clock.swig在 /themes/next/layout/_macro/sidebar.swig 中引入:
1 | {% include '../_custom/clock.swig' %} |
可根据自己的偏好来设置具体位置,我是加在了侧栏的末尾:
另一款样式可参考:
网站运行时间
- 在 /themes/next/layout/_custom/ 下新建 runtime.swig,拷贝如下内容:
1 | <div id="days"></div> |
修改 BirthDay 为你建站的时间
- 在 /themes/next/layout/_macro/sidebar.swig 中引入:
1 | {% include '../_custom/runtime.swig' %} |
网站动态背景图片
在 /themes/next/source/css/_custom/custom.styl 中设置 body 属性
1 | body { |
其中的 url 可根据 Unsplash Source 这个网站来生成,比如随机选择、根据指定用户选择等等,效果:
其它的背景点击特效—波浪、线条、水纹波动等,可以在主题 _config.yml 中 canvas 系列进行设置,如 canvas_nest、canvas_ribbon。 motion 配置项则是设置诸如侧栏、文章标题的加载动画。
网站 logo 炫彩效果
PC 端只显示在左上角 logo 位置,移动端效果如下
我使用的是 NexT 5 的 Pisces(主题 _config.yml 中 scheme 配置),主要设置样式为 site-meta,其它的主题类型需要自己调整。在 /themes/next/source/css/_custom/custom.styl 中添加以下 css ,如果之前已经设置了,根据情况进行替换:
1 | .site-title{ |
其它炫彩字体效果可参考:
旋转魔方(个性化返回顶部)
效果 1 :
效果 2 :
之前回到顶部功能使用的是一张图片,大屏幕下计算会有问题,然后自己就在魔方里加了个方法来实现,正好移动端也能用。
说一下这个猫的配置吧,给有需要的朋友。只需在 /themes/next/source/css/_custom/custom.styl 添加如下代码:
1 | .back-to-top { |
然后修改 background 里的 url 为图片地址。 下载图片 保存为 scroll.png 放到 /themes/next/source/images/ 目录即可。
魔方一
在 100素材网 看到的,自己修改了下大小就放网站里来了。在 /themes/next/layout/_custom/ 下新建 cube-mini.swig(名字随便吧 -.- ),内容如下:
cube-mini.swig当然,也可以直接扒 100 素材网的样式再修改。
魔方二
样式来自 FEWY,初始时魔方比较大,我已调整。在 /themes/next/layout/_custom/ 下新建 cube-hollow.swig,内容如下:
cube-hollow.swig引用
- 在 /themes/next/layout/_custom/custom.swig 中引入新建的文件
1 | <!-- 旋转魔方 --> |
- 在主题 _config.yml 中新建以下动态配置项
1 | cube: |
图片链接替换成你自己的,hexo 三连,移动端也有效果了,enjoy!
一些建议
图片压缩
可以使用 WebP 格式 的图片替代 JPG、PNG 等,比如这样: 示例图片,在 Chrome 和 FireFox 都正常,IE 和 Safari 目前还不兼容,毕竟是谷歌推出的技术。我们也可通过修改 hexo 代码,增加 webp 图片支持,比如 这篇文章,不过也有点麻烦 -.-!
下边推荐一个不错的网站,在线 JPG to WebP,再 WebP to JPG,图片就会被压缩,支持 GIF 、Video 等多种格式转换。
Online GIF maker and image editor
比如我上传本地 JPG 图片,下方显示:
1 | File size: 509.99KiB, width: 1182px, height: 1182px, type: png |
转换成 webp 后,大小仅有 26 kb 左右,即上边的示例图片:
1 | File size: 26.34KiB (-94.84%), width: 1182px, height: 1182px, frames: 1, type: webp |
拷贝转换后的 webp 图片地址,再选择 WebP to JPG 选项,粘贴进输入框,upload 后,在 image quality factor、Background color 默认情况下,转回 JPG :
1 | File size: 59.33KiB (+125.26%), width: 1182px, height: 1182px, type: jpg |
相比 webp,图片又变大了,但相比原图,却是小了很多,压缩了好几倍,清晰度没什么太大变化。部分图片压缩效果可能没那么理想,比如本身就不大的图片,有时候反而还压大了。转 PNG 图片会大一些,可先转为 JPG,对清晰度要求不高的,可以尝试多转换几次。

